


DIY Gaming Console 2026
The resurgence of custom gaming hardware has reached fever pitch in 2026. From Arduino-powered handhelds that fit in your pocket to full-scale gaming PCs pushing 4K at 240Hz, the maker movement has proven that the most satisfying gaming experiences often come from systems you build yourself. This isn’t about rejecting commercial hardware—it’s about understanding what’s inside your console, customizing it to your exact specifications, and gaining the technical knowledge that transforms passive consumption into active creation.
Building your own gaming hardware offers tangible advantages beyond the satisfaction of DIY completion. Cost savings can reach 30-40% compared to commercial equivalents, particularly in the handheld and retro gaming space. You gain complete control over component selection, from the exact joystick tension in your fight stick to the cooling solution in your gaming PC. Perhaps most importantly, you develop troubleshooting skills and technical literacy that serve you long after the soldering iron cools.
This guide addresses builders at every skill level. Absolute beginners can start with Arduino-based handhelds requiring minimal soldering and basic programming. Intermediate makers will find detailed Raspberry Pi builds and custom controller projects. Advanced builders can tackle full gaming PC construction or experimental projects like portable gaming rigs with custom water cooling. The projects scale not just in difficulty but in cost—from $50 Arduino handhelds to $3,500 enthusiast gaming PCs.
Understanding Gaming Hardware Fundamentals
Before selecting components for any gaming project, you need to grasp the fundamental systems that make gaming possible. Every gaming device, from a simple Arduino handheld to a modern gaming PC, relies on four core subsystems working in concert.
Processing Power and Graphics Rendering
The heart of any gaming system is its processing capability. In simple terms, the CPU (Central Processing Unit) handles game logic, physics calculations, and system operations, while the GPU (Graphics Processing Unit) renders visuals. This division of labor varies significantly across platforms.
Arduino-based systems use microcontrollers like the ATmega328P, which integrate both processing and basic graphics on a single chip. These handle simple 2D sprite-based games at resolutions like 128×160 pixels. The Arduino official documentation provides technical specifications showing processing speeds around 16MHz—adequate for retro-style games but incapable of complex 3D rendering.
Raspberry Pi systems employ SoCs (System-on-Chip) that combine ARM processors with integrated graphics. The Raspberry Pi 5, running a quad-core Cortex-A76 at 2.4GHz with VideoCore VII graphics, can emulate PlayStation 2 games at playable framerates when properly configured. This represents roughly 400x the processing power of an Arduino.
Custom gaming PCs separate CPU and GPU entirely, allowing independent upgrades and performance scaling. A modern AMD Ryzen 7 9800X3D paired with an NVIDIA RTX 5070 Ti delivers performance measured in teraflops—computational power that would have required a supercomputer
facility two decades ago. Tom’s Hardware’s comprehensive PC building guides detail how these components work together.
Input Systems and Control Interfaces
Input latency—the delay between pressing a button and seeing the result—can make or break a gaming experience. Different gaming platforms handle input fundamentally differently.
Microcontroller systems use direct GPIO (General Purpose Input/Output) connections, where button presses are read through pull-up or pull-down resistors. This creates minimal latency (typically under 1ms) but requires manual debouncing in code to prevent false triggers from mechanical switch bounce.
More sophisticated systems use specialized input controllers. Fight sticks employ zero-delay USB encoders like the Brook Zero-Pi or custom PCBs that poll buttons at 1000Hz, ensuring competitive-grade responsiveness. The difference between a standard USB polling rate (125Hz) and a gaming-grade rate (1000Hz) represents 7ms versus 1ms of input lag—critical in fighting games where frame-perfect inputs determine victory.
Modern gaming PCs support advanced input features like Hall effect sensors (which use magnetic fields instead of physical contact for longer lifespan) and programmable macro functions. Understanding these differences helps you select appropriate components for your skill level and gaming style.
Display Technologies and Resolution Constraints
Display selection involves balancing resolution, refresh rate, response time, and cost against your processing capabilities. Each platform has distinct practical limits.
For Arduino projects, small OLED or LCD displays (0.96″ to 3.5″) running at 128×64 to 320×240 pixels provide adequate clarity for sprite-based games while remaining within the microcontroller’s rendering capabilities. SPI (Serial Peripheral Interface) displays offer faster refresh rates than I2C alternatives—crucial for avoiding ghosting in fast-paced games.
Raspberry Pi builds can drive displays from 480p to 4K, though practical gaming limits depend on the emulated system. The Pi 5 handles 1080p N64 emulation smoothly but struggles with 4K on demanding titles. Understanding your target console’s original resolution helps set realistic expectations—emulating a 240p SNES game at 4K wastes processing power better spent on frame stability.
Gaming PC builds offer maximum flexibility but require matching display capabilities to GPU performance. A $1,500 build with an RTX 5070 Ti targets 1440p at 144Hz as its sweet spot, while 4K 60Hz requires stepping up to RTX 5080-class hardware. PC Gamer’s display technology guides explain these performance tiers in detail.
Power Delivery and Battery Management
Power systems often receive insufficient attention in DIY builds, yet poor power delivery causes more project failures than any other factor.
Arduino handheld projects typically run on 3.7V lithium polymer batteries (300-1000mAh depending on size constraints). Critical considerations include protection circuitry to prevent over-discharge (which permanently damages lithium cells), appropriate charging modules with current limiting, and voltage regulation to maintain stable 5V or 3.3V logic levels. A 500mAh battery powering an Arduino drawing 80mA provides approximately 6 hours runtime—adequate for portable gaming but requiring careful component selection to avoid power-hungry displays or excessive LED usage.
Raspberry Pi projects demand substantially more power—the Pi 5 requires a proper 5V 5A power supply (27W) for stable operation under load. Battery-powered Pi builds need multi-cell configurations (typically 3S or 4S lithium packs) with step-down converters, plus active cooling to prevent thermal throttling. Underestimating power requirements leads to random crashes, corrupted storage, and frustrated builders.
Gaming PCs present different challenges. Modern high-end GPUs like the RTX 5090 can draw 575W under load—more than most complete systems from a decade ago. Tom’s Hardware’s PSU buying guides recommend 80 Plus Gold or Platinum certified supplies for efficiency, with sufficient wattage headroom (typically 20-30% above calculated maximum draw) to ensure stable voltage delivery and accommodate future upgrades.
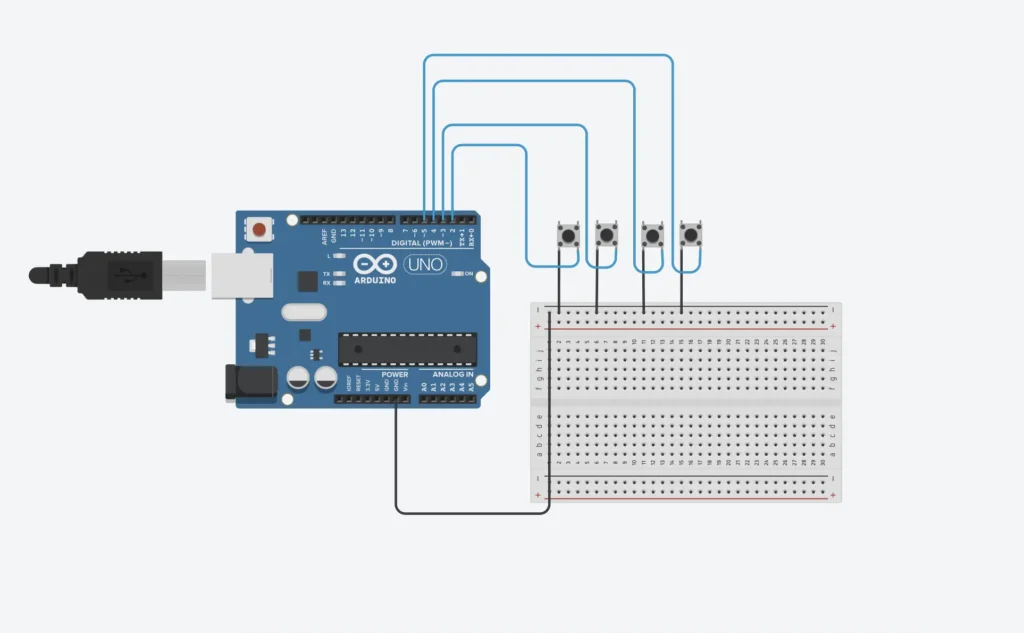
Arduino-Based Handheld Consoles
Arduino platforms represent the most accessible entry point to custom gaming hardware. These microcontroller-based projects teach fundamental electronics, programming, and system integration while producing genuinely playable gaming devices. The Arduino Project Hub hosts hundreds of gaming projects demonstrating the platform’s versatility.
Historical Context and Modern Evolution
The original DIY gaming movement traces back to projects like Technology Will Save Us’ DIY Gamer Kit, which gained coverage in WIRED and The Verge around 2013-2014. These kits proved that accessible, educational electronics could produce functional gaming devices. While the original kits have been discontinued, their legacy lives on in modern equivalents like the Arduboy (an open-source Game Boy-style handheld) and numerous community-developed projects.
Today’s Arduino gaming landscape benefits from mature software libraries, standardized hardware modules, and extensive community knowledge. The progression from blinking an LED to running playable games has never been more achievable.
Component Selection and Bill of Materials
Building an Arduino handheld in 2026 requires careful component matching to avoid compatibility issues. Here’s a complete parts breakdown with current pricing:
Microcontroller Options:
- Arduino Leonardo or Pro Micro (ATmega32u4): $12-18 – Native USB support, essential for game controllers
- Arduino Mega 2560 (ATmega2560): $15-25 – More pins and memory for complex projects
- ESP32 Dev Board: $8-15 – WiFi/Bluetooth capable, significantly more powerful than classic Arduinos
Display Modules:
- 0.96″ OLED 128×64 (I2C): $5-8 – Crisp monochrome display, low power consumption
- 1.8″ TFT LCD 128×160 (SPI): $8-12 – Full color, faster refresh for smoother gameplay
- 2.4″ ILI9341 TFT 240×320: $12-18 – Larger viewing area, requires more processing power
Input Components:
- Tactile buttons (12mm): $0.15-0.25 each (need 6-8)
- Mini joystick module (analog): $2-4
- D-pad silicone membrane with PCB: $3-6
Audio System:
- Piezo buzzer: $0.50-1 – Simple beeps and tones
- Small speaker (8Ω 0.5W) with amplifier: $3-5 – Better sound quality
Power Management:
- 3.7V Li-Po battery (500-1000mAh): $6-12
- TP4056 charging module: $1-2
- Boost converter (3.7V to 5V): $2-4
- On/off switch: $1-2
Enclosure:
- 3D printed custom case: $8-15 in materials (if you have printer access)
- Laser-cut acrylic panels: $10-20
- Pre-made project box with modifications: $5-10
Total Cost Range: $50-120 depending on component quality and enclosure choice
Build Process Overview
The construction sequence follows this logical progression:
Phase 1: Breadboard Prototyping Before any permanent assembly, wire your complete system on a breadboard. Connect the display, buttons, and power system to verify compatibility. This stage catches pin conflicts, voltage issues, and display incompatibilities before you commit to soldering. Load a simple test program that reads button states and displays the results—if anything fails here, troubleshooting is vastly easier than after soldering.
Phase 2: Permanent Assembly Transfer your verified design to a perforated prototype board or custom PCB. Through-hole components work best for beginners—surface-mount components save space but require more soldering skill. Use female headers for the Arduino itself (allowing component reuse in future projects) and direct-solder other components. Keep wire runs short to minimize electromagnetic interference, and use proper gauge wire (22-24 AWG for signals, 18-20 AWG for power).
Phase 3: Enclosure Integration The enclosure serves both protective and ergonomic functions. Position buttons for comfortable thumb access (typically 15-20mm apart for adult hands, 12-15mm for younger users). Mount the display at a slight viewing angle rather than perfectly flat. Ensure adequate ventilation—microcontrollers generate minimal heat, but LCDs with backlights can warm up during extended sessions. Plan for charging port access and consider including a battery level indicator LED.
Programming and Game Development
Arduino gaming uses C/C++ with the Arduino IDE framework. The Adafruit Learning System provides excellent beginner tutorials covering the fundamentals.
Essential Libraries:
- Adafruit GFX – Graphics primitives (lines, circles, text)
- Adafruit_SSD1306 – OLED display driver
- TFT_eSPI – Optimized TFT/LCD library with sprite support
- Arduboy2 – Complete game engine for Arduboy-compatible builds
Starter Project Progression:
- Button Test Program (30 minutes): Display button states on screen, verify all inputs work correctly. This teaches digitalRead() and basic display updates.
- Pong Clone (4-6 hours): Implement paddle movement, ball physics, and collision detection. This introduces game loops, sprite movement, and score tracking.
- Flappy Bird Style Game (6-8 hours): Create scrolling obstacles, gravity physics, and procedural generation. This covers more complex game state management.
- Simple Platformer (12-20 hours): Implement collision maps, jumping mechanics, and level design. This represents advanced Arduino game development.
The Arduino gaming community shares thousands of open-source games on GitHub. Study existing code to understand optimization techniques like lookup tables for trigonometry and sprite compression for limited memory.
Performance Limitations and Optimization
Understanding the constraints of microcontroller gaming sets realistic expectations and guides optimization efforts.
Technical Limits:
- Frame rates typically max at 30-60fps depending on display type and rendering complexity
- Memory constraints (2KB RAM on ATmega328P, 2.5KB on ATmega32u4) limit sprite count and game state complexity
- No floating-point hardware—use integer math and fixed-point arithmetic for smooth performance
- Limited audio—typically single-channel beeps, though libraries like ATMlib enable chiptune music
Optimization Strategies:
- Dirty rectangle rendering: Only update screen regions that changed rather than full screen refreshes
- Sprite atlases: Combine multiple graphics into single bitmaps to reduce memory overhead
- Bitwise operations: Use bit shifting and masking instead of multiplication/division
- Lookup tables: Pre-calculate expensive operations like sine/cosine values
These limitations aren’t deficiencies—they’re creative constraints that encourage elegant code and thoughtful game design. Some of the most compelling games emerge from working within tight resource boundaries.
Community Resources and Extended Learning
The Arduino gaming community provides extensive support for builders:
Online Platforms:
- r/ArduinoProjects subreddit – Active community sharing builds and troubleshooting
- Arduboy Community Forums – Specifically focused on handheld gaming
- Arduino Forum – Official support with responsive experts
Learning Resources:
- SparkFun Tutorials – Excellent component-specific guides
- ETA Prime YouTube channel – Video demonstrations of gaming projects
- Instructables Arduino section – Step-by-step photo guides
Parts Sourcing:
- US: Adafruit, SparkFun, Micro Center
- Europe: Pimoroni, Reichelt Elektronik
- Global: AliExpress for budget components (with longer shipping times)
Raspberry Pi Retro Gaming Systems
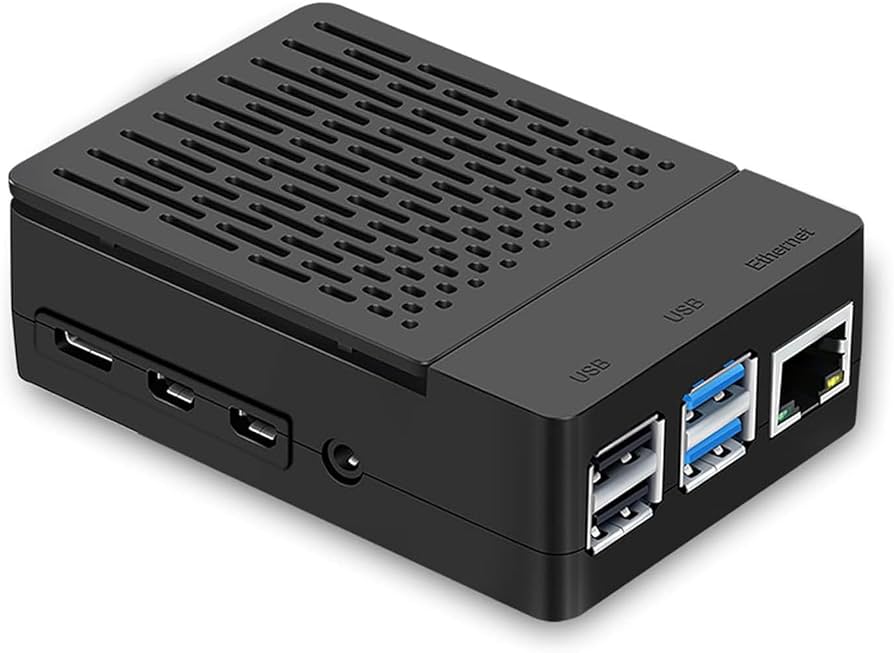
Raspberry Pi platforms dominate the retro gaming emulation scene, offering dramatically more power than Arduino while maintaining reasonable costs and strong community support. The Raspberry Pi Foundation’s official documentation provides comprehensive technical resources.
Platform Comparison: Pi Models for Gaming
Raspberry Pi 5 (4GB/8GB/16GB):
- Quad-core Cortex-A76 at 2.4GHz (overclockable to 3.0GHz)
- VideoCore VII GPU, supports dual 4K60 displays
- PCIe 2.0 interface enables NVMe SSD storage for dramatically faster load times
- Emulation capabilities: Smooth PS2, GameCube, PSP; experimental Xbox, Switch
- Price: $60-120 depending on RAM
- Best for: Demanding emulation, 4K output, future-proofing
Raspberry Pi 4 (2GB/4GB/8GB):
- Quad-core Cortex-A72 at 1.8GHz
- VideoCore VI GPU, dual 4K30 or single 4K60 output
- Emulation capabilities: Excellent up to PS1, acceptable N64/Dreamcast with optimization
- Price: $35-75 (when in stock)
- Best for: Budget builds focusing on 16-bit and earlier systems
Raspberry Pi Zero 2 W:
- Quad-core Cortex-A53 at 1GHz
- Compact form factor ideal for portable builds
- Emulation capabilities: Strong up to SNES, acceptable GBA, struggles with PS1
- Price: $15
- Best for: Ultra-compact handhelds, dedicated single-system emulation
The Pi 5 represents a substantial leap over the Pi 4—Tom’s Hardware benchmarks show 2-3x CPU performance gains and significantly improved thermal management with the official active cooler.
Emulation Operating Systems Compared
Three major distributions dominate Pi gaming, each with distinct philosophies:
RetroPie:
- Most mature platform with extensive game compatibility
- EmulationStation frontend with detailed customization options
- Excellent controller support including Bluetooth pairing
- Steeper learning curve but maximum flexibility
- Best for: Users comfortable with command-line configuration
Recalbox:
- Streamlined setup prioritizing plug-and-play experience
- Built-in WiFi controller support via smartphone app
- Netplay (online multiplayer) enabled by default
- Simplified scraper for automatic game artwork/metadata
- Best for: Beginners wanting quick setup
Lakka:
- Lightweight distribution based on LibRetro
- Minimal interface focusing on pure gaming performance
- Fastest boot times and lowest resource overhead
- Less hand-holding during configuration
- Best for: Dedicated gaming appliances, performance-focused builds
All three platforms legally support emulation hardware—the ROM files themselves require ownership of original games. The EFF’s emulation FAQ clarifies the legal landscape around game preservation.
Handheld Pi Builds
Creating a portable Raspberry Pi gaming system requires careful integration of display, controls, battery, and cooling in a ergonomic package.
Commercial Kits vs. Custom Builds:
Semi-commercial options like the PiBoy DMG provide injection-molded cases, integrated controls, and purpose-built PCBs. At $120-150 (not including Pi), these kits save significant time but limit customization. The Pi Hut stocks various commercial handheld kits with different form factors.
Fully custom builds require more work but enable unique designs:
Display Selection:
- 3.5″ 640×480 GPIO displays: $25-35 – Compact, direct connection, limited viewing angles
- 5″ 800×480 HDMI displays: $35-50 – Better image quality, requires HDMI cable routing
- 7″ 1024×600 HDMI displays: $45-65 – Excellent visibility, larger form factor
Control Integration:
- USB controller boards with integrated joysticks/buttons: $15-30
- Individual arcade buttons wired to GPIO: $10-20 total
- Pre-made PCB button sets: $20-35
Battery Solutions: Power requirements vary by Pi model and display backlight brightness:
- Pi Zero 2 W builds: 2500-5000mAh at 5V provides 4-8 hours
- Pi 4 builds: 10,000mAh minimum for 3-5 hours runtime
- Pi 5 builds: 15,000-20,000mAh for equivalent runtime (higher power draw)
Use quality power banks with reliable voltage regulation. Cheap units cause undervoltage warnings and system instability. Include a battery percentage indicator (either hardware module or software overlay) to prevent mid-game shutdowns.
Thermal Management: Handheld builds trap heat, making active cooling essential for sustained performance:
- Pi Zero/Pi 4: Passive heatsinks sufficient for most emulation
- Pi 5: 30mm cooling fan required for GameCube/PS2 emulation to prevent thermal throttling
Position fans to exhaust hot air from the case rather than recirculating it internally. Jeff Geerling’s thermal testing demonstrates the dramatic performance difference proper cooling makes.
Desktop/TV-Connected Builds
Stationary Pi gaming systems trade portability for better cooling, larger screens, and expanded storage.
Case Selection Criteria:
- Adequate ventilation for long gaming sessions
- Easy access to SD card and ports for configuration
- Optional: Built-in fan mounting for active cooling
- Aesthetic appeal if displayed visibly
Popular options include the Argon ONE M.2 case (supports NVMe storage via USB adapter), Flirc aluminum case (passive cooling), and Retroflag NESPi cases (nostalgic console aesthetics).
Controller Support: The Pi’s Bluetooth stack supports virtually any modern controller:
- Xbox controllers (USB or Bluetooth)
- PlayStation DualShock/DualSense (Bluetooth)
- Switch Pro controllers (Bluetooth)
- Original USB controllers via adapters
- Vintage controllers via USB adapters (Retrolink, 8BitDo)
Configure controllers in EmulationStation’s input configuration—the system automatically maps buttons to each emulator’s expected layout. For arcade games, consider mapping based on genre (fighting games prefer different layouts than shmups).
4K Output Considerations: The Pi 5 supports 4K output, but smart configuration prevents performance issues:
- Set EmulationStation UI to 1080p for snappy menu navigation
- Configure individual emulators based on source material (240p/480p games don’t benefit from 4K rendering)
- Use integer scaling for pixel-perfect retro game display
- Reserve 4K for systems that natively supported HD (Dreamcast, PS2)
Advanced Pi Modifications
Overclocking for Performance: The Pi 5 officially supports overclocking through configuration file edits:
over_voltage_delta=50000
arm_freq=3000
gpu_freq=1000
This configuration boosts CPU to 3.0GHz and GPU to 1.0GHz—providing approximately 25% performance gains but requiring active cooling. Raspberry Pi’s official overclocking documentation details safe voltage limits and stability testing procedures.
Custom Firmware Benefits: Beyond stock configurations, custom builds enable:
- Shader overlays for CRT filter effects
- Automated save state management
- Custom bezels and per-game artwork
- Achievement systems via RetroAchievements integration
- Cloud save synchronization
- Automated ROM scraping and organization
Network Play Configuration: Modern emulation platforms support online multiplayer for classic games:
- RetroArch’s netplay requires port forwarding for hosting
- Typical latency requirements: <50ms for fighting games, <100ms for most others
- Compatible emulators include SNES9x, Genesis Plus GX, FBNeo (arcade)
The RetroArch documentation explains netplay setup in detail, including relay server configuration for NAT traversal.
Storage and ROM Management
SD Card vs. SSD Performance: SD cards (even UHS-I/II models) bottleneck load times and system responsiveness. The Pi 5’s PCIe interface enables NVMe SSD boot:
- Load time reduction: 50-70% for large games
- Menu navigation: Noticeably snappier with shader previews
- Recommended: 256GB minimum for diverse game library
- Compatible SSD list on Tom’s Hardware
Legal ROM Acquisition: The emulation community strongly advocates legal game ownership:
- Rip cartridges using devices like Retrode or similar
- Extract discs using PC optical drives and appropriate software
- Purchase legitimate ROM collections where available
- Avoid commercial ROM sites—they’re legally problematic and frequently inject malware
Organization Best Practices:
- Consistent naming (use No-Intro or Redump naming conventions)
- Separate folders by region (USA, Europe, Japan)
- Favorite lists for quick access to rotation games
- Regular backups of save files (use cloud storage or NAS)
Single-Board Computer Gaming Beyond Pi
While Raspberry Pi dominates mindshare, alternative SBCs offer compelling performance and price advantages for specific use cases.
High-Performance ARM Alternatives
Odroid N2+:
- Hexa-core big.LITTLE architecture (4×Cortex-A73 + 2×Cortex-A53)
- Significantly faster PS2/GameCube emulation than Pi 4
- Native HDMI CEC for TV remote control
- Price: $75-95 depending on RAM (2GB/4GB)
- Best for: Demanding retro emulation without jumping to x86
Orange Pi 5:
- Octa-core with Mali-G610 GPU
- 4K media playback capabilities
- M.2 NVMe support
- Price: $80-150 depending on configuration
- Best for: Multimedia-focused builds combining emulation and streaming
Rock Pi 5:
- RK3588 SoC with impressive GPU performance
- PCIe 3.0 support
- Up to 32GB RAM configurations
- Price: $100-200
- Best for: Experimental builds, future-proofing
These boards generally run Android or Linux distributions, requiring more manual emulation setup than Pi’s polished RetroPie environment. However, raw performance often justifies the additional configuration effort for demanding emulation tasks.
x86 Single-Board Options
X86 architecture offers native Windows compatibility and superior emulation for systems like Xbox and PS3 that require high single-thread performance.
Intel NUC Elements:
- Full x86 processing (11th/12th gen mobile CPUs)
- Integrated Iris Xe graphics sufficient for moderate emulation
- Price: $250-400 for barebone kits
- Best for: Windows-specific emulators, productivity alongside gaming
LattePanda Sigma:
- Intel Core i5-1340P with 12 cores
- Integrated Arduino coprocessor for hardware projects
- Active cooling included
- Price: $400-500
- Best for: Hybrid projects combining PC gaming and hardware interfacing
Performance Considerations: X86 emulators generally offer better optimization and accuracy than ARM counterparts for 6th-generation consoles (PS2, GameCube, Xbox). However, power consumption and heat generation increase substantially—these boards require proper ventilation and draw 15-45W under load vs. 5-15W for ARM alternatives.
Cost-Performance Analysis
Is the performance gain worth the price premium?
ARM SBCs ($60-150):
- Excellent value for 5th generation and earlier emulation
- Lower power consumption enables passive cooling
- Limited upgrade path
- Software support varies by vendor
x86 SBCs ($250-500):
- Superior single-thread performance for demanding emulators
- Native Windows compatibility
- Future-proof for emulator development
- Higher ongoing power costs
Steam Deck Comparison: The Valve Steam Deck ($399-649) offers professional-grade handheld gaming with significantly more power than any SBC. For portable gaming specifically, its custom AMD APU outperforms all SBC options. However, SBC builds maintain advantages in customization, repair costs, and multi-purpose use.
Linux Gaming Ecosystem
Running games natively on ARM or x86 Linux SBCs requires understanding the platform’s capabilities and limitations.
Proton/Wine Compatibility: Valve’s Proton (compatibility layer for running Windows games on Linux) has dramatically improved Linux gaming. However:
- ARM devices can’t run x86 Windows games at all (different CPU architecture)
- X86 SBCs with limited GPU power struggle with Proton overhead
- Best results require AMD or Intel discrete graphics
Native Linux Games:
- Thousands of indie titles support Linux natively
- Older commercial games (Civilization IV, Half-Life 2, etc.) run well
- Modern AAA titles increasingly support Linux via Proton
- Steam’s Linux catalog shows compatible games
Realistic Expectations: SBC gaming works best for:
- Emulation (primary use case)
- Older native Linux games
- Lightweight indie titles
- Streaming from powerful PC (Moonlight, Steam Link)
Don’t expect competitive performance with modern Windows gaming—SBCs excel at retro gaming and specialized applications rather than cutting-edge titles.
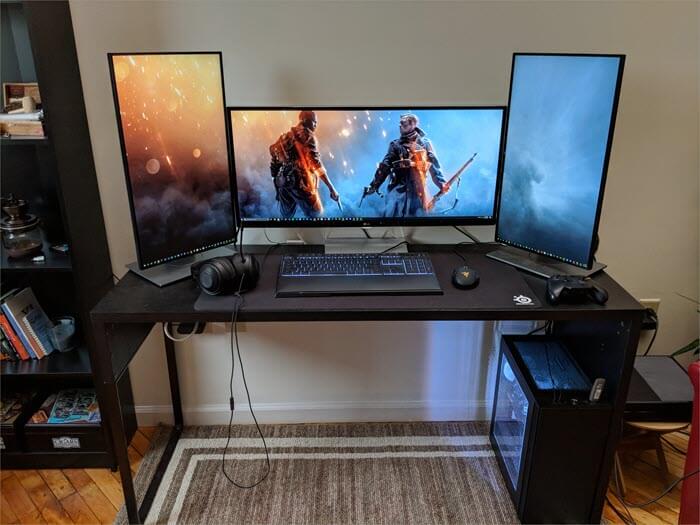
Custom Gaming PCs
Building a gaming PC from components offers maximum performance, complete control over specifications, and the satisfaction of assembling a complex system. The PC Part Picker compatibility tool helps ensure component compatibility while finding competitive pricing.
2026 Component Landscape
CPU Architecture Battle:
AMD’s AM5 platform has solidified its position as the gaming champion. The Ryzen 7 9800X3D leverages 96MB of 3D V-Cache to deliver exceptional gaming performance, while standard Ryzen 7000/9000 chips offer excellent value across price points. Intel’s 14th and 15th generation Core processors remain competitive in productivity tasks but generally trail in gaming performance per dollar.
Key advantage of AMD’s AM5 socket: Upgrade path through at least 2027, meaning you can drop in next-generation CPUs without replacing the motherboard.
GPU Performance Tiers:
NVIDIA’s RTX 50 series launched throughout 2025, bringing DLSS 4 frame generation and improved ray tracing. AMD’s RX 9000 series (Radeon RX 9070 XT, RX 9060 XT) provides strong rasterization performance at lower prices but trails in ray tracing capabilities.
Current performance brackets:
- 1080p gaming: RTX 5060, RX 9060 XT (8-16GB models)
- 1440p gaming: RTX 5070 Ti, RX 9070 XT
- 4K gaming: RTX 5080, RX 9070 XTX
- Absolute maximum: RTX 5090 (32GB GDDR7, $1,999)
Tom’s Hardware GPU hierarchy ranks every card by actual gaming performance, not just specifications.
Memory Standards:
DDR5 has become mainstream, with 6000MHz CL30 kits offering the sweet spot of price and performance for AMD AM5 builds. 32GB (2×16GB) has become the recommended standard for gaming in 2026—many new titles utilize over 16GB when maxing settings.
Storage Evolution:
PCIe Gen 5 NVMe drives deliver read speeds exceeding 12,000 MB/s, though Gen 4 drives (7,000 MB/s) remain the value choice. For gaming, the difference is minimal—prioritize capacity over bleeding-edge speed. 1TB minimum for OS and games, 2TB ideal.
Three-Tier Build Recommendations
Budget Tier: 1080p Gaming ($800-1,000)
Component List:
- CPU: AMD Ryzen 5 7600X ($190-220)
- Motherboard: ASRock B650M-HDV/M.2 ($110-130)
- RAM: G.Skill Flare X5 16GB DDR5-6000 CL30 ($75-90)
- GPU: AMD RX 9060 XT 8GB ($300-350)
- Storage: TeamGroup MP34 1TB Gen 4 NVMe ($70-85)
- PSU: EVGA 650W 80+ Bronze ($65-80)
- Case: Fractal Design Focus G ($60-75)
- CPU Cooler: Thermalright Assassin King 120 SE ($20-25)
Total: $890-1,055
This build targets 1080p high settings at 60+ fps in modern titles. The RX 9060 XT’s 8GB VRAM handles current games but may limit longevity—consider the 16GB variant if budget allows.
Performance Analysis: TechSpot benchmarks show this configuration averaging 85fps in AAA titles at 1080p high settings, with esports titles easily exceeding 144fps for competitive gaming.
Mid-Range Tier: 1440p High Settings ($1,400-1,800)
Component List:
- CPU: AMD Ryzen 7 7700X ($280-310)
- Motherboard: MSI MAG B650 TOMAHAWK WIFI ($180-210)
- RAM: G.Skill Trident Z5 Neo 32GB DDR5-6000 CL30 ($130-160)
- GPU: NVIDIA RTX 5070 Ti 16GB ($700-800)
- Storage: Samsung 990 Pro 2TB Gen 4 NVMe ($190-230)
- PSU: Corsair RM850x 80+ Gold ($130-150)
- Case: Lian Li Lancool 216 ($100-120)
- CPU Cooler: Thermalright Peerless Assassin 120 SE ($35-45)
Total: $1,745-2,025
This configuration demolishes 1440p gaming while maintaining headroom for 4K in less demanding titles. The RTX 5070 Ti brings exceptional ray tracing performance and DLSS 4 support.
Expected Performance: 100+ fps at 1440p ultra settings in most games, with DLSS enabling higher framerates in supported titles. Ray tracing remains playable with DLSS Quality mode.
Enthusiast Tier: 4K/VR Excellence ($2,500-3,500)
Component List:
- CPU: AMD Ryzen 7 9800X3D ($450-500)
- Motherboard: ASUS ROG STRIX X870E-E Gaming WIFI ($400-450)
- RAM: G.Skill Trident Z5 Neo RGB 32GB DDR5-6400 CL30 ($180-220)
- GPU: NVIDIA RTX 5090 32GB ($1,900-2,100)
- Storage: Corsair MP700 PRO 2TB Gen 5 NVMe ($300-350)
- PSU: Corsair HX1200 80+ Platinum ($250-300)
- Case: Fractal Design Torrent ($180-220)
- CPU Cooler: Arctic Liquid Freezer III 360mm AIO ($130-160)
Total: $3,790-4,300
This represents the pinnacle of consumer gaming hardware. The RTX 5090 handles 4K ultra settings with ray tracing across virtually all titles, while VR gaming runs flawlessly at maximum fidelity.
Performance Ceiling: Native 4K 60-120fps in demanding titles, 144+ fps in esports games. VR performance exceeds current headset capabilities—this build future-proofs for next-generation VR hardware.
Assembly Process
Building a PC intimidates beginners, but the process follows logical steps. Tom’s Hardware’s detailed build guide walks through each phase with photos.
Preparation Phase:
- Clear workspace with good lighting
- Gather tools: Phillips screwdriver, cable ties, thermal paste (usually pre-applied)
- Ground yourself frequently (touch metal case) to prevent static discharge
- Organize components and read all manuals before starting
Installation Sequence:
- Install I/O shield in case: The metal backplate for motherboard ports—push firmly until all sides click
- Mount motherboard standoffs: Brass spacers prevent motherboard from touching case metal (critical for avoiding shorts)
- Install CPU and RAM outside case: Easier access, better visibility
- AMD: Lift socket lever, align CPU triangle to socket triangle, close lever gently
- Intel: Similar process with different socket mechanism
- RAM: Match notch position, press firmly until clips engage both sides
- Install M.2 SSD: Remove motherboard heatsink (if present), insert drive at 30° angle, secure with screw, replace heatsink
- Attach CPU cooler: Apply thermal paste if not pre-applied (small pea-sized dot), align mounting bracket, tighten screws gradually in X pattern
- Mount motherboard in case: Align with standoffs and I/O shield, secure with screws (don’t overtighten)
- Install PSU: Position with fan facing ventilation (usually bottom of case), secure with four screws
- Install GPU: Remove slot covers, align with PCIe x16 slot, press firmly, secure with screws
- Cable management:
- 24-pin motherboard power
- 8-pin (or 4+4 pin) CPU power
- PCIe power to GPU (may require multiple 8-pin connectors)
- SATA power to drives
- Front panel connectors (power button, USB, audio)
- Final checks: Verify all power connections, ensure no cables contact fans, confirm RAM fully seated
BIOS Configuration and Optimization
First boot requires entering BIOS (typically by pressing DEL or F2 during startup):
Essential Settings:
- Enable XMP/EXPO for RAM (runs memory at rated speed instead of default lower speed)
- Set boot drive priority (NVMe SSD first)
- Enable Resizable BAR (improves GPU performance)
- Configure fan curves (balance noise and cooling)
- Verify CPU temperatures (should be under 40°C at idle)
Advanced Optimizations:
- Enable PBO (Precision Boost Overdrive) for AMD CPUs—automatic intelligent overclocking
- Adjust power limits for optimal performance/efficiency balance
- Configure RGB lighting synchronization
- Set up RAID arrays if using multiple drives
Benchmarking and Validation
After OS installation, validate performance and stability:
Testing Suite:
- 3DMark – GPU stress testing and scoring
- Cinebench 2024 – CPU rendering performance
- MemTest86 – RAM stability testing (run overnight)
- CrystalDiskMark – Storage performance verification
Compare results against expected performance for your components. Significant underperformance indicates configuration issues or faulty hardware.
Custom Controllers and Input Devices
While commercial controllers satisfy most gamers, custom builds enable perfect ergonomics, premium components, and personal aesthetics. The modding community has developed extensive resources for creating professional-grade peripherals.
Arcade Fight Stick Construction
Fight sticks for competitive fighting games demand precision components and thoughtful ergonomics.
Case Selection:
Commercial Options:
- All Fight Sticks Panzer 3 ($100-150) – Steel construction, tournament-grade quality
- Eternal Rival Mpress ($70-95) – Lighter aluminum, portable focus
- MadCatz TE2+ empty shell ($60-80) – Repurpose classic case with modern internals
DIY Options:
- Custom laser-cut acrylic design ($30-50 materials + access to laser cutter)
- 3D printed cases from Thingiverse models ($40-70 in filament)
- Modified IKEA furniture (surprisingly popular and functional)
Button and Joystick Selection:
Japanese components from Sanwa and Seimitsu dominate competitive play:
Sanwa OBSF-30 buttons ($2.50-3.50 each):
- Extremely light actuation force
- Quiet operation
- Standard in Japanese arcade cabinets
- Available in 20+ colors
Seimitsu PS-14-GN buttons ($3-4 each):
- Slightly stiffer than Sanwa (more resistant to accidental presses)
- Softer tactile feel
- Preferred by some traditional arcade players
Joystick Options:
- Sanwa JLF-TP-8YT ($25-35) – Industry standard, widely available parts
- Seimitsu LS-32 ($30-40) – Shorter throw, stiffer spring, preferred for Korean fighters
- Hori Hayabusa ($30-40) – Quieter operation, slightly lighter feel
Focus Attack and Paradise Arcade Shop stock authentic Japanese components with detailed specifications.
PCB Controllers:
The brains of the fight stick translate button presses to controller signals:
Brook Zero-Pi ($50-65):
- Universal compatibility (PS5, Xbox Series, Switch, PC)
- 1ms polling rate
- Removable cable design
- Industry standard for tournament play
Zero Delay USB Encoder ($10-15):
- PC-only compatibility
- Adequate response time for casual play
- Budget-friendly option
Assembly Process:
- Layout Planning: Mark button positions using template (standard Vewlix layout most common), typically 30mm spacing for 6-button configuration
- Drilling/Cutting: 30mm hole saw for buttons, 24mm for joystick mounting (if not pre-cut)
- Wiring Harness: Connect buttons to PCB using .110″ Quick disconnects, create common ground daisy chain to minimize wiring
- Artwork Integration: Print custom artwork on adhesive vinyl or use plexiglass overlay to protect designs
- Testing: Connect to PC and use button testing software before final assembly
Cost Breakdown:
- Basic build: $80-120 (budget case, Sanwa parts, zero-delay encoder)
- Tournament-grade: $180-280 (premium case, Sanwa parts, Brook PCB)
- Custom premium: $300-500+ (exotic case materials, full Seimitsu build, custom artwork)
Custom Gamepad Modifications
Modifying existing controllers or building custom pads enables personalized ergonomics and performance enhancements.
Hall Effect Joystick Upgrades:
Traditional potentiometer-based analog sticks wear out, developing drift over time. Hall effect sensors use magnetic fields instead of physical contact, eliminating drift and extending lifespan dramatically.
Installation Process:
- Disassemble controller (requires Torx security bits for Xbox/PS)
- Desolder original stick module
- Install Hall effect replacement (GuliKit modules popular choice)
- Calibrate new stick ranges in controller software
Compatible with: Xbox Elite controllers, PS5 DualSense, Switch Pro Controller
Programmable Button Remapping:
Custom PCBs enable advanced button functions:
- Macro recording for complex input sequences
- Rapid fire toggling
- Profile switching for different games
- Adjustable trigger sensitivity
Popular options: BattleBeaver customs, SCUF infinity boards (Xbox), eXtremeRate boards (PlayStation)
Trigger Modifications:
Hair Trigger Locks:
- Reduce trigger travel distance by 50-70%
- Faster shooting in FPS games
- Simple mechanical installation
Adaptive Trigger Enhancement (PS5):
- Replace stock trigger motors with adjustable variants
- Fine-tune resistance per game
- Requires soldering skills and calibration
Accessibility Controllers
Custom controllers enable gaming for users with motor disabilities. The AbleGamers Foundation provides extensive resources and design guidance.
Adaptive Button Layout:
Large Button Designs:
- 60mm+ diameter arcade buttons reduce precision requirements
- Configurable spacing accommodates different reach capabilities
- Mountable to wheelchair arms or custom stands
Single-Switch Gaming:
- Scan-based input systems cycle through available actions
- Adjustable scan speed accommodates different response times
- Compatible with commercial games using accessibility features
Switch Integration Systems:
3.5mm Jack Compatibility:
- Standard for adaptive switches (allows use of existing medical switches)
- Hub devices aggregate multiple switches to standard controller outputs
- Xbox Adaptive Controller ($100) provides official Microsoft solution
Software Customization:
Windows Accessibility Features:
- Eye tracking input via Tobii hardware
- Voice command integration
- Slow keys/sticky keys for reduced motor precision requirements
Game-Specific Options:
- Many modern titles include extensive remapping and difficulty adjustments
- Aim assist strength adjustment
- Extended interaction timing windows
Custom accessibility controllers typically require collaboration between builder and end user to perfect ergonomics and functionality.
Racing Wheel and HOTAS Builds
Sim racing and flight simulation benefit dramatically from custom control solutions.
Racing Wheel Components:
Force Feedback Motors:
- Direct drive wheels ($400-1500) – Maximum fidelity, professional-grade feel
- Belt-driven systems ($200-400) – Good feedback, affordable
- DIY conversions using automotive electric power steering motors (advanced project)
Pedal Systems:
- Load cell brake pedals provide pressure-based input (more realistic than position-based)
- Hydraulic dampers add realism to throttle/clutch
- Custom pedal boxes position controls for comfortable ergonomics
Flight Stick Projects:
Gimbal Construction:
- 3D printed or machined components
- Magnetic sensors for position detection (higher precision than potentiometers)
- Adjustable spring tension for personalized feel
Button Panels:
- Integrate toggle switches, rotary encoders, multi-position switches
- Label clearly for muscle memory development
- Consider ergonomic placement for frequently-used controls
Cost Comparison to Commercial:
Budget commercial wheel sets ($150-250) vs. DIY ($100-180) – Minimal savings, commercial preferred for beginners
Mid-range commercial ($300-600) vs. DIY ($250-400) – Custom enables better components at lower cost
High-end commercial ($800-2000) vs. DIY ($400-900) – Substantial savings possible with mechanical skills
Parts Sourcing for Custom Controllers
Component Suppliers:
Arcade Parts:
- Focus Attack (US) – Authentic Japanese components, excellent documentation
- Arcade World UK (Europe) – European shipping, good selection
- IST Mall (South Korea) – Crown buttons/joysticks, Korean specialty parts
General Electronics:
- Digi-Key – Professional-grade electronics components
- Mouser – Similar to Digi-Key, competitive pricing
- AliExpress – Budget components, longer shipping, verify authenticity
Design Resources:
CAD Files:
- Thingiverse – 3D printable controller shells
- GrabCAD – Professional CAD models
- Slagcoin’s arcade stick guide – Comprehensive dimensional references
PCB Design:
- EasyEDA – Free browser-based PCB design
- KiCad – Professional open-source PCB CAD
- JLCPCB – Affordable PCB manufacturing ($5-20 for small boards)
Advanced Topics and Modifications
Console Modification Projects
Modern commercial consoles often benefit from thoughtful modifications improving functionality or convenience.
Nintendo Switch Enhancements:
Dock Alternatives:
- Skull & Co Jumpgate dock ($50-70) – Portable, reduces TV setup bulk
- DIY USB-C hubs with HDMI output – Cheaper but verify USB-C spec compliance to avoid damaging Switch
- Always use official Nintendo power adapters to prevent power delivery issues
Storage Expansion:
- Replace stock SD card with high-capacity, high-speed alternative
- Recommended: Samsung EVO Select, SanDisk Extreme (A2 rating essential)
- 256GB minimum for digital library, 512GB ideal
PlayStation Portal Modifications:
WiFi Optimization:
- Replace internal WiFi antenna with higher-gain alternatives (advanced, requires disassembly)
- Configure QoS on home router prioritizing Portal traffic
- Consider WiFi 6E mesh system for reduced latency
Xbox Elite Controller Customization:
Component Upgrades:
- Hall effect stick replacement (eliminates drift)
- Custom analog stick heights (concave vs. convex tops)
- Trigger stop adjustment (reduce overtravel)
- Removable thumbstick extensions
iFixit teardowns provide detailed disassembly guides with component identification.
Portable Gaming PC Builds
Creating handheld Windows gaming PCs represents bleeding-edge DIY hardware integration.
Hardware Foundation:
Mini-ITX Approach:
- Intel NUC 11/12 boards with discrete laptop GPUs
- Custom 3D printed cases
- Integrated display (7-9″ 1080p touch panels)
- Battery system supporting 45-65W power draw
Challenges:
- Thermal management in compact enclosure
- Controller integration (typically external via Bluetooth)
- Power efficiency optimization
- Ergonomic compromises
Software Configuration:
Windows Optimization:
- Steam Big Picture mode for controller navigation
- Custom power profiles balancing performance and battery
- TDP limiting software for temperature control
- Automated sleep/wake scripts
Cost Reality Check:
DIY portable gaming PC: $800-1500 depending on component selection Steam Deck 512GB: $649 ASUS ROG Ally: $699
The Deck and Ally offer vastly superior portability, battery life, and polish. Custom builds make sense only for specific requirements (maximum performance, Windows-exclusive software, learning experience).
Multi-System Emulation Boxes
Consolidated retro gaming solutions running multiple console emulators from single hardware.
Hardware Selection:
x86 Mini PC Options:
- Intel NUC 13 with Iris Xe graphics ($400-600 barebones)
- Beelink SER6 Max (AMD 7000 series APU) ($450-650)
- Minisforum EliteMini UM780 XTX (Radeon 680M) ($500-750)
These provide sufficient performance for every classic console plus many 6th-gen systems (PS2, GameCube, Xbox).
Software Setup:
Batocera Linux:
- Plug-and-play experience similar to RetroPie but x86-optimized
- Supports broader emulator ecosystem
- Kodi integration for media playback
- WiFi controller support
LaunchBox Premium ($30):
- Windows-based frontend with exceptional polish
- Unified library across all emulators
- Automatic scraping and media downloads
- BigBox mode for TV/controller navigation
Water Cooling in Compact Builds
Liquid cooling enables sustained performance in small form factors but requires careful planning.
AIO (All-In-One) Coolers:
Closed-loop systems provide excellent cooling with minimal complexity:
- 240mm radiators fit most mid-tower cases
- 280mm/360mm options for maximum cooling (check case compatibility)
- Top-mount vs. front-mount affects GPU temperatures (plan air flow path)
Installation considerations:
- Pump orientation (ensure no air trapped at pump)
- Radiator positioning (higher than pump prevents air lock)
- Fan orientation (intake vs. exhaust affects overall case airflow)
Custom Loop Considerations:
Full custom loops offer:
- Superior cooling potential
- Aesthetic flexibility (colored coolants, visible tubing routes)
- Ability to cool GPU and CPU in same loop
Drawbacks:
- 3-5x cost vs. AIO
- Maintenance requirements (coolant replacement every 12-18 months)
- Leak risk if improperly assembled
Gamers Nexus thermal testing demonstrates real-world cooling performance across different approaches.
RGB Control and Synchronization
Unified lighting control across components requires compatible ecosystems or universal controllers.
Manufacturer Ecosystems:
ASUS Aura Sync:
- Controls ASUS motherboards, GPUs, RAM, peripherals
- Coordination with compatible third-party devices
MSI Mystic Light:
- Similar approach for MSI components
Corsair iCUE:
- Comprehensive control over Corsair hardware
- Extensive effect customization
Universal Solutions:
OpenRGB:
- Open-source software supporting 50+ brands
- No bloatware, lightweight operation
- Community-driven device support
Hardware Controllers:
- NZXT RGB & Fan Controller – Independent of motherboard
- Razer Chroma Hub – Integrates non-Razer devices
- Phanteks Universal RGB controller – Basic synchronization
Custom Firmware and Software Modifications
Motherboard BIOS Modifications:
Advanced users can flash custom BIOS versions enabling:
- Improved memory overclocking
- Extended voltage control
- Enhanced cooling profiles
Warning: BIOS modifications can brick hardware if done incorrectly. Only proceed if comfortable with recovery procedures.
Game Console Custom Firmware:
Many older consoles support custom firmware enabling homebrew and extended functionality:
- PlayStation Vita: Full Linux capability, emulation powerhouse
- Nintendo 3DS: Region unlocking, save management, homebrew games
- Original Xbox: XBMC (now Kodi) media center, emulation
Legality varies by jurisdiction—research local laws regarding DRM circumvention.
Software, Tools, and Resources
Essential Software
Emulation Platforms:
RetroArch:
- Unified multi-system emulator frontend
- Save state management with rewind support
- Shader system for visual effects
- Netplay online multiplayer
- Cross-platform (Windows, Linux, Android, iOS, web)
Standalone Emulators:
- Dolphin (GameCube/Wii) – Superior accuracy vs. RetroArch core
- PCSX2 (PS2) – Active development, excellent compatibility
- Xenia (Xbox 360) – Experimental but progressing rapidly
- Yuzu/Ryujinx (Switch) – Controversial but functional
Game Development Platforms:
Godot Engine:
- Free, open-source game engine
- Excellent 2D capabilities suitable for retro game creation
- Growing 3D feature set
- Lightweight resource requirements
Unity Personal:
- Industry-standard engine
- Massive asset store and tutorial ecosystem
- Free for revenue under $100K/year
Pico-8:
- Fantasy console platform perfect for learning game development
- Deliberately constrained specifications force creative solutions
- Vibrant community sharing games and code
Benchmarking and Monitoring:
HWiNFO64:
- Comprehensive hardware monitoring
- Temperature, voltage, clock speed tracking
- Logging capabilities for stability testing
MSI Afterburner:
- GPU overclocking and monitoring
- Frame rate overlay
- Video capture functionality
Prime95/AIDA64:
- CPU stress testing for stability validation
- Identifies marginal overclocks and cooling inadequacies
Physical Tools and Equipment
Soldering Equipment:
For projects requiring permanent electrical connections:
Soldering Irons:
- Hakko FX-888D ($100-130) – Industry standard, reliable temperature control
- Pinecil ($26) – Portable USB-C iron, surprisingly capable
- TS100 ($50-70) – Compact, precise, popular with hobbyists
Accessories:
- Lead-free solder (0.8mm diameter for electronics)
- Flux pen (improves solder flow and joint quality)
- Desoldering pump and wick (for fixing mistakes)
- Helping hands with magnification
- Silicone work mat (heat resistant, easy cleaning)
3D Printer Recommendations:
For custom cases, button mounts, and brackets:
FDM Printers:
- Bambu Lab A1 Mini ($200-250) – Excellent beginner printer, reliable
- Prusa MK4 ($800-1000) – Premium option, outstanding support
- Creality Ender 3 V3 ($200-300) – Budget option requiring tinkering
Print Material:
- PLA for most projects (easy printing, adequate strength)
- PETG for higher temperature resistance
- TPU for flexible parts (grips, dampeners)
Hand Tools:
Essential Kit:
- Precision screwdriver set (Phillips, Torx, hex)
- Needle-nose pliers
- Wire cutters/strippers
- Digital multimeter (voltage, continuity testing)
- Anti-static wrist strap
- Tweezers (straight and angled)
Advanced Additions:
- Logic analyzer (debugging SPI/I2C communications)
- Oscilloscope (for signal integrity analysis)
- Heat gun (shrink tubing, component removal)
Online Communities and Knowledge Sharing
Forums and Discussion Boards:
r/SBCGaming (Reddit):
- 90,000+ members focused on single-board computer gaming
- Daily discussions on new devices, optimization, troubleshooting
- Beginner-friendly atmosphere
r/BuildAPC (Reddit):
- Active community for PC building advice
- Part compatibility verification
- Budget optimization assistance
BitBuilt Forums:
- Portable console modification specialists
- Advanced projects (portable GameCube, PlayStation, etc.)
- Detailed build logs and tutorials
EmuMovies Forums:
- Arcade cabinet building community
- Artwork and media resources
- Hardware recommendations
Discord Servers:
Retro Handhelds Discord:
- Real-time troubleshooting assistance
- New device announcements
- Firmware and software support channels
PC Master Race Discord:
- General PC gaming and building
- Price tracking and deal alerts
- Component comparison discussions
Component Suppliers
United States:
Adafruit Industries:
- Curated selection of quality components
- Extensive learning resources and tutorials
- Premium pricing but excellent support
SparkFun Electronics:
- Similar to Adafruit with different product selection
- Open-source hardware focus
- Good selection of breakout boards and modules
Micro Center:
- Brick-and-mortar + online
- CPU/motherboard combo deals
- Same-day pickup availability (major cities)
Europe:
Pimoroni (UK):
- Raspberry Pi specialist
- Quality components and kits
- European shipping, VAT included in pricing
Reichelt Elektronik (Germany):
- Massive component catalog
- Professional-grade parts
- Excellent for bulk orders
Global Sources:
AliExpress:
- Rock-bottom prices on many components
- 3-6 week shipping to most countries
- Verify seller ratings carefully (counterfeit components exist)
Taobao:
- Enormous Chinese marketplace
- Requires purchasing agent for international shipping
- Access to rare components and factory-direct pricing
Design and Documentation Resources
CAD File Repositories:
Thingiverse:
- Millions of free 3D models
- Search for game controller shells, arcade enclosures, Pi cases
- Community remixes and variations
GrabCAD:
- Professional CAD models
- Higher quality than Thingiverse on average
- Good for reference designs
GitHub:
- Open-source hardware schematics
- PCB designs (Eagle, KiCad formats)
- Firmware and software for gaming projects
PCB Design Tools:
KiCad:
- Professional open-source PCB design suite
- No limitations on board size or layers
- Learning curve but extremely capable
EasyEDA:
- Browser-based PCB design
- Integrated with JLCPCB manufacturing
- Simpler interface than KiCad
Documentation Platforms:
Hackaday:
- Featured build logs and projects
- Detailed technical writeups
- Active comments sections with expert feedback
Instructables:
- Step-by-step photo guides
- Beginner-friendly documentation style
- Printable PDF guides
Troubleshooting and Common Issues
Power Delivery Problems
Symptom: Random resets, “lightning bolt” icons, system instability
Arduino Handhelds:
- Verify battery voltage under load (should maintain >3.5V for 3.7V nominal cells)
- Check boost converter output stability (measure with multimeter during operation)
- Replace worn batteries (lithium cells degrade after 300-500 charge cycles)
- Add bulk capacitors (100-470µF) near power-hungry components
Raspberry Pi Systems:
- Use official power supply or equivalent quality (cheap adapters cause 90% of stability issues)
- Measure voltage at GPIO header (should maintain 4.8-5.2V under load)
- Thick, short USB-C cables reduce voltage drop
- Pi 5 specifically requires 5A capability—3A adapters cause throttling
Gaming PCs:
- Verify all PCIe power connectors fully seated (common oversight causing GPU crashes)
- Check PSU wattage sufficient for components (add 20% overhead for transient loads)
- Test with different wall outlet (older building wiring can cause issues)
- Replace aging PSUs (capacitors degrade after 5-7 years)
Display Compatibility Issues
Symptom: Blank screen, distorted image, flickering
Arduino Projects:
- Verify SPI/I2C address matches code (use I2C scanner sketch to detect)
- Check voltage levels (some displays require 5V logic, others 3.3V)
- Inspect solder connections on display module (cold solder joints common failure point)
- Test with minimal code example before full project (isolate software vs. hardware)
Raspberry Pi:
- Edit config.txt boot settings to force resolution and refresh rate
- HDMI adapters (HDMI to DVI, etc.) can cause detection problems—try direct connection
- Some displays require HDMI CEC to be disabled
- Overclocking can cause display instability—revert to stock clocks for testing
Gaming PC:
- Update GPU drivers (fixes 70% of display problems)
- Test with different cable (DP vs. HDMI, ensure correct version for resolution/refresh)
- Disable G-Sync/FreeSync temporarily to isolate variable refresh issues
- Check monitor input source selection
Input Lag and Latency
Symptom: Delayed response to button presses, “mushy” feel
All Platforms:
- Disable V-Sync in games (adds 1-2 frame delay)
- Use “game mode” on TVs (reduces internal processing delay from 100ms+ to 20-30ms)
- Wired connections preferred over wireless (Bluetooth adds ~8-12ms latency)
- USB hub can introduce polling delays—connect directly to host
Fight Sticks:
- Verify PCB polling rate (should be 1000Hz for tournament play)
- Check for loose button microswitches (wobble indicates wear)
- Test button timing with online input display tools
- Some PCBs have configurable SOCD cleaning—ensure settings match preference
Gaming PC Specific:
- Enable GPU low-latency mode in driver control panel
- Disable in-game frame limiters (let monitor handle via adaptive sync)
- Update motherboard chipset drivers (affects USB polling reliability)
- High background CPU usage causes input stutter—close unnecessary processes
Thermal Management Failures
Symptom: System slowdowns, crashes under load, excessive fan noise
Raspberry Pi:
- Pi 5 requires active cooling for sustained loads—passive heatsinks insufficient for PS2/GameCube
- Verify fan actually running (check for obstruction or failed connector)
- Improve case airflow (drill ventilation holes if solid case)
- Thermal paste on CPU (aftermarket application improves temps 5-10°C)
Gaming PC:
- Verify CPU cooler properly mounted (should require significant pressure to install)
- Check thermal paste application (pea-sized drop in center, spreads during mounting)
- Dust accumulation blocks airflow—clean with compressed air every 6 months
- Case fan configuration matters (front intake, rear/top exhaust creates positive pressure)
- GPU thermal pads degrade over time—replacement improves temps 10-20°C on older cards
Thermal Throttling Tests:
- Monitor clock speeds during sustained load (should maintain boost clocks)
- Temperature thresholds: CPUs throttle at 95-105°C, GPUs at 80-95°C
- Immediate throttling indicates cooler contact problem
- Gradual throttling over minutes indicates inadequate cooling capacity
Software Configuration Errors
Symptom: Games won’t launch, controller not recognized, missing features
Arduino:
- Verify correct board selected in Arduino IDE (Uno vs. Leonardo vs. Mega affects compilation)
- Serial port selection critical for upload
- Library version mismatches cause cryptic errors—check library manager
- Memory overflow common issue (monitor sketch size vs. available space)
Raspberry Pi:
- ROM path configuration in EmulationStation (must match actual file locations)
- BIOS files required for many systems (PS1, Saturn, etc.)—check emulator logs
- Controller configuration persists globally—new controllers need manual mapping
- WiFi country code must be set or WiFi disabled entirely
Gaming PC:
- DirectX/Visual C++ redistributables required by most games (install from Microsoft)
- Antivirus false positives block game executables (add exceptions)
- Outdated motherboard BIOS causes USB and RAM compatibility problems (update cautiously)
- Windows Game Mode can help or hurt depending on game—test both ways
Component Compatibility Conflicts
Symptom: System won’t boot, components not recognized, instability
RAM Compatibility:
- Verify RAM on motherboard QVL (Qualified Vendor List) for guaranteed compatibility
- Enable XMP/EXPO manually—won’t activate automatically
- Mismatched RAM kits cause instability even if same specs (buy paired kits)
- Single-rank vs. dual-rank affects overclocking potential
PCIe Device Conflicts:
- Check PCIe lane allocation (CPU lanes vs. chipset lanes affect bandwidth)
- Bifurcation support required for some M.2 adapters (motherboard BIOS setting)
- Older GPUs may not support Resizable BAR (disable in BIOS if causing crashes)
USB Bandwidth Issues:
- Too many devices on single controller causes dropouts
- Front panel USB often shares controller with other ports
- USB 2.0 devices on USB 3.0 ports can cause interference
- Powered USB hubs solve many multi-device problems
Testing and Validation Procedures
Systematic Troubleshooting Approach:
- Isolate Variables: Test one change at a time
- Return to Known Good: Default settings establish baseline
- Methodical Testing: Work through possibilities systematically rather than random changes
- Document Changes: Track what you’ve tried (easy to forget after multiple attempts)
- Community Search: Someone has likely encountered identical problem—search forums before posting
When to Seek Expert Help:
- Smoke or burning smell (stop immediately, disconnect power)
- Physical damage to components
- Persistent crashes after exhausting software solutions
- Electrical measurements outside safe ranges
Conclusion
Building custom gaming hardware in 2026 offers opportunities across all skill levels and budgets. The Arduino enthusiast soldering together a $60 handheld learns the same fundamental skills that inform $3,000 gaming PC builds—understanding power requirements, component compatibility, thermal management, and systematic troubleshooting.
Start with your skill level, not your aspirations. The beginner who successfully completes a simple Arduino gaming project gains confidence and knowledge that transfers to more complex builds. The intermediate maker who mods a fight stick with premium components develops soldering technique applicable to general electronics. The advanced builder assembling a high-end gaming PC learns system integration and optimization that extends beyond gaming to professional workstation construction.
The most satisfying builds aren’t necessarily the most expensive or complex—they’re the ones you complete, use, and learn from. A basic Arduino handheld running Tetris that you built yourself provides more educational value and pride than an unfinished ambitious project collecting dust.
The future of DIY gaming hardware looks bright. Single-board computers continue improving price-to-performance ratios. 3D printing enables increasingly sophisticated enclosure designs. Component availability expands as hobbyist markets mature. Software tools become more accessible with each generation.
Choose your entry point, gather your components, and start building. The gaming hardware you create with your own hands will deliver satisfaction far beyond any commercial equivalent. The technical literacy you develop empowers you to repair, upgrade, and optimize systems throughout your computing life.
Whether you’re reviving classic games on a Raspberry Pi, crafting the perfect fight stick, or building a gaming PC tailored to your exact needs, you’re participating in a tradition of makers and tinkerers that extends back to the earliest days of computing. Welcome to the club.
FAQ
What is the cheapest way to build a gaming console?
The most affordable path to building a gaming console starts with Arduino-based handhelds. A complete Arduino gaming handheld can be assembled for $50-70 using basic components: an Arduino Pro Micro microcontroller ($12-15), a 1.8-inch TFT display ($8-12), tactile buttons ($2-3 total), a small speaker ($3-5), a 500mAh lithium battery with charging module ($8-10), and a 3D-printed or laser-cut enclosure ($8-15 in materials). This budget system runs simple 2D games like Tetris, Snake, and basic platformers at playable framerates. For retro game emulation, a Raspberry Pi Zero 2 W ($15) with RetroPie software provides excellent 8-bit and 16-bit console emulation when paired with a used display ($15-25) and basic controls ($10-15), totaling approximately $65-80 for a functional retro gaming system.
Can you build a handheld gaming PC?
Yes, you can build a handheld gaming PC, though it presents significant technical and practical challenges. The approach typically involves a Mini-ITX motherboard with mobile CPU, a compact display (7-9 inches), integrated controls, and a substantial battery system capable of delivering 45-65W continuously. However, this path costs $800-1,500 and requires advanced skills in 3D design, electronics integration, and thermal management. More practical alternatives include commercial options like the Steam Deck ($399-649) or ASUS ROG Ally ($600-700), which offer superior portability, battery life, software optimization, and overall polish. DIY handheld gaming PCs make sense primarily as learning projects or when you need specific capabilities not available in commercial devices, such as maximum performance or Windows-exclusive software compatibility.
What’s the best single-board computer for retro gaming?
The Raspberry Pi 5 currently represents the best single-board computer for retro gaming across multiple criteria. With its quad-core Cortex-A76 processor running at 2.4GHz (overclockable to 3.0GHz) and VideoCore VII graphics, it handles emulation from 8-bit systems through PlayStation 2 and GameCube with playable performance. The Pi 5’s PCIe 2.0 interface enables NVMe SSD storage, dramatically reducing load times compared to SD card-based systems. Priced at $60-120 depending on RAM configuration (4GB, 8GB, or 16GB), it offers the best balance of performance, community support, and software maturity. RetroPie, Recalbox, and other emulation distributions provide polished, user-friendly experiences. Alternative SBCs like the Orange Pi 5 or Rock Pi 5 offer similar or better raw performance but lack the Pi’s extensive documentation, accessory ecosystem, and troubleshooting resources that make it ideal for beginners and experienced builders alike.
How much does it cost to build a gaming PC in 2026?
Gaming PC build costs in 2026 span three distinct tiers based on target performance. Budget builds for 1080p gaming at high settings cost $800-1,000, typically featuring an AMD Ryzen 5 7600X CPU ($190-220), AMD RX 9060 XT 8GB GPU ($300-350), 16GB DDR5 RAM ($75-90), 1TB NVMe SSD ($70-85), and supporting components. Mid-range systems targeting 1440p at high refresh rates run $1,400-1,800, built around a Ryzen 7 7700X ($280-310), NVIDIA RTX 5070 Ti 16GB ($700-800), 32GB DDR5 RAM ($130-160), and higher-quality power supply and cooling. Enthusiast-tier builds for 4K ultra settings with ray tracing cost $2,500-3,500, featuring AMD Ryzen 7 9800X3D ($450-500), NVIDIA RTX 5090 32GB ($1,900-2,100), premium components throughout, and advanced cooling solutions. These prices exclude monitors, keyboards, mice, and operating system, which add $200-600 depending on quality preferences.
Is it cheaper to build or buy a gaming console?
Building custom gaming hardware is cheaper than commercial consoles for retro emulation and basic gaming, but not for modern AAA gaming. An Arduino handheld ($50-120) costs less than a Nintendo Switch ($299) while teaching valuable electronics skills, though it only plays simple homebrew games. A Raspberry Pi 4 RetroPie setup ($120-200 complete) provides broader retro gaming than dedicated mini-consoles ($60-100 for limited game selections). However, for current-generation gaming, commercial consoles offer better value. A PlayStation 5 ($499) or Xbox Series X ($499) provides performance requiring a $1,200-1,500 gaming PC to match. The cheapest viable modern gaming PC ($800-1,000) outperforms consoles in upgradeability and game library but costs nearly double. The decision ultimately depends on priorities: DIY builds maximize learning and customization; commercial consoles optimize cost-per-performance for modern games.
What tools do I need to build a custom console?
Essential tools for custom console building vary by project complexity. Basic Arduino handheld projects require a soldering iron ($50-100 for quality temperature-controlled model), solder and flux ($10-15), wire cutters and strippers ($15-20), a small Phillips screwdriver set ($10-15), a breadboard for prototyping ($5-8), and a multimeter for voltage and continuity testing ($20-40). Add a helping hands tool with magnification ($15-25) and anti-static wrist strap ($5-10) for easier work. Raspberry Pi builds need fewer tools since most connections don’t require soldering—just screwdrivers and basic hand tools ($20-30 total). Custom gaming PC assembly requires only a Phillips screwdriver, though adding an anti-static wrist strap ($5-10) provides peace of mind. Advanced projects benefit from a 3D printer ($200-1,000), heat gun ($25-40), and logic analyzer ($50-150). Total investment ranges from $30 for simple Pi builds to $200+ for complex electronic projects requiring soldering and fabrication capabilities.
Can Raspberry Pi run modern games?
Raspberry Pi cannot run modern AAA games at playable framerates due to limited CPU and GPU performance compared to gaming PCs and consoles. The Raspberry Pi 5’s quad-core ARM processor and integrated VideoCore VII graphics struggle with contemporary games requiring x86 architecture and discrete graphics cards. However, the Pi excels at several gaming categories: retro emulation (8-bit through PlayStation 2 era), lightweight indie titles ported to Linux, streaming from powerful PCs using Steam Link or Moonlight, and browser-based games. Native Linux gaming on Pi works well for older titles like Half-Life 2, Civilization IV, and thousands of indie games from Steam’s Linux catalog. The Pi 5 can run some modern indie games at low settings—simple titles like Terraria, Stardew Valley, and Celeste work acceptably. For genuine modern gaming performance, minimum requirements start around $800-1,000 for a budget gaming PC build with discrete graphics.
What’s the difference between Arduino and Raspberry Pi for gaming?
Arduino and Raspberry Pi serve fundamentally different gaming purposes due to their distinct architectures and capabilities. Arduino uses simple microcontrollers (8-bit to 32-bit) running at 16MHz-240MHz with 2KB-256KB RAM, making them ideal for simple 2D sprite-based games at resolutions like 128×160 pixels. Arduino projects teach electronics fundamentals, require programming in C/C++, handle real-time input with minimal latency, and cost $12-25 for the board alone. They create original homebrew games but cannot emulate existing consoles. Raspberry Pi uses powerful ARM processors (quad-core at 1-2.4GHz) with 1-16GB RAM and dedicated GPUs, enabling complex emulation of multiple console generations, native Linux game execution, and higher resolution displays up to 4K. Pi projects require less electronics knowledge, use pre-built operating systems like RetroPie, cost $15-120 depending on model, and excel at recreating retro gaming experiences. Choose Arduino for learning electronics and creating simple original games; choose Raspberry Pi for emulation and more sophisticated gaming applications.
How long does it take to build a custom gaming PC?
Building a custom gaming PC typically requires 2-6 hours depending on experience level and build complexity. First-time builders should budget 4-6 hours, allowing time to carefully follow instructions, double-check connections, and avoid rushing critical steps. This includes unpacking components (15-30 minutes), installing CPU, RAM, and M.2 SSD on motherboard (30-45 minutes), mounting motherboard in case (15-30 minutes), installing power supply and graphics card (30-45 minutes), cable management (45-90 minutes), and first boot/BIOS configuration (30-60 minutes). Experienced builders complete straightforward builds in 2-3 hours by streamlining cable management and working more confidently. Complex builds with custom water cooling, extensive RGB synchronization, or intricate cable routing can extend to 8-12 hours spread across multiple sessions. Add 1-2 hours for Windows installation and driver updates after hardware assembly. The time investment pays dividends in knowledge—subsequent builds go much faster, and troubleshooting skills develop with each project.
Do I need programming knowledge to build a gaming console?
Programming knowledge requirements vary significantly by project type. Arduino-based gaming handhelds absolutely require programming skills in C/C++—you must write code to handle input, draw graphics, implement game logic, and manage system resources. However, the Arduino platform provides excellent learning resources, and copying existing game code teaches programming by example. Expect a 20-40 hour learning curve for basic game creation. Raspberry Pi retro gaming systems require no programming—pre-built operating systems like RetroPie offer plug-and-play experiences where you configure settings through menus, add game files, and map controllers visually. Basic Linux familiarity helps troubleshooting but isn’t mandatory. Custom gaming PCs need zero programming knowledge—assembly is entirely mechanical, and BIOS configuration uses menu navigation. Advanced customization (scripting RGB effects, automated overclocking profiles) benefits from basic programming, but remains optional. Fight sticks and custom controllers similarly require no programming, just mechanical assembly and wire connections. Choose your project based on whether you want to learn programming or focus on hardware skills.
What’s the best screen for a DIY handheld console?
The optimal screen for DIY handheld consoles balances resolution, viewing angle, power consumption, refresh rate, and cost against your platform’s capabilities. For Arduino handhelds, small TFT LCDs in the 1.8-3.5 inch range work best—specifically ILI9341 2.4″ displays ($12-18) offering 240×320 resolution with SPI interface for faster refresh rates than I2C alternatives. These provide adequate pixel density at handheld viewing distances while remaining within Arduino’s rendering capabilities. Raspberry Pi handhelds benefit from larger displays: 5″ 800×480 HDMI screens ($35-50) offer good image quality, wide viewing angles, and familiar HDMI connectivity, while 7″ 1024×600 displays ($45-65) improve visibility for longer gaming sessions at the cost of increased size and battery drain. Critical specifications include viewing angle (IPS panels vastly superior to TN), touch capability (optional, adds $5-15), and brightness levels (200+ nits for outdoor visibility). Avoid OLED displays despite superior image quality—burn-in from static game UI elements and higher power consumption make them poor choices for gaming handhelds.
How do I add WiFi to my DIY console?
Adding WiFi connectivity to DIY gaming consoles requires different approaches based on platform. Arduino projects use ESP32 or ESP8266 modules ($8-15) which integrate WiFi and Bluetooth—these replace standard Arduino boards entirely since they include more powerful processors plus wireless capabilities. Connect the ESP32 to displays and controls identically to Arduino, but gain WiFi for multiplayer gaming, cloud saves, and over-the-air firmware updates. Programming uses Arduino IDE with ESP32 board support. Raspberry Pi includes built-in WiFi (except original Model A/B), requiring only software configuration through the operating system’s network manager—no hardware additions needed. Configure WiFi credentials by editing wpa_supplicant.conf file or using the desktop interface. For optimal gaming performance, use 5GHz networks instead of congested 2.4GHz when available. Gaming PCs support WiFi through motherboard integration (check specifications) or add-on PCIe WiFi cards ($25-60) with external antennas. Ethernet connections provide superior latency and stability for competitive gaming, but modern WiFi 6/6E approaches wired performance for casual play.
What emulators work on Raspberry Pi?
Raspberry Pi supports emulators for virtually every retro gaming system, with performance scaling by Pi model and console generation. The Raspberry Pi 5 handles emulation from earliest consoles through PlayStation 2 and GameCube. Supported systems include NES, SNES, Sega Genesis/Master System (perfect performance), PlayStation 1 (flawless), Nintendo 64 (excellent with some titles requiring tweaking), Dreamcast (very good), PSP (good to excellent), PlayStation 2 (playable in many titles with overclock), and GameCube (playable for most games). The Pi 4 performs similarly through PSP but struggles with PS2 and GameCube. Earlier models work excellently through SNES/Genesis but have limitations on 3D systems. RetroPie includes dozens of pre-configured emulators: lr-fceumm (NES), lr-snes9x (SNES), lr-genesis-plus-gx (Genesis), lr-beetle-psx (PS1), lr-mupen64plus-next (N64), and Dolphin (GameCube). Arcade emulation uses MAME, FinalBurn Neo, or Daphne for LaserDisc games. Home computer systems like Commodore 64, Amiga, and DOS also work. Performance varies by specific game and emulator settings—check compatibility lists before expecting perfect accuracy.
Can I 3D print a console case?
Yes, 3D printing excels at creating custom console cases with complete design freedom unavailable through commercial options. Popular projects include Raspberry Pi handheld cases styled after Game Boy, PlayStation Portable, or original designs, Arduino enclosures with integrated button mounts and display bezels, fight stick cases with ergonomic hand positions, and PC case modifications for unique aesthetics. Print times range from 4-8 hours for small Arduino cases to 30-60 hours for large Pi handheld builds requiring multiple pieces. Material costs typically run $8-30 depending on case size and infill percentage. PLA filament works for most projects due to easy printing and adequate strength, while PETG offers better heat resistance for components generating warmth. Design files are available free on Thingiverse, Printables, and MyMiniFactory, or create custom designs using Fusion 360 or TinkerCAD. Recommended printers for gaming console projects include Bambu Lab A1 Mini ($200-250, beginner-friendly), Prusa MK4 ($800-1,000, premium quality), or Creality Ender 3 V3 ($200-300, budget option). Print quality affects fit tolerances—calibrate your printer carefully for snap-fit button mounts and precise screw holes.
How much battery life can a DIY handheld get?
DIY handheld gaming console battery life depends on power draw and battery capacity selection. Arduino-based handhelds consume 50-150mA depending on display backlight brightness and component choices. A 1000mAh lithium battery provides 6-12 hours runtime—significantly longer than commercial handhelds due to simple graphics and efficient microcontroller operation. Optimization strategies include dimming the display (backlight dominates power use), using OLED displays (only lit pixels consume power), implementing sleep modes, and running at lower clock speeds. Raspberry Pi Zero 2 W handhelds draw 500-800mA, requiring 5000-8000mAh battery banks for 6-8 hours of gaming. Standard Pi 4 builds consume 1.5-2.5A, needing 10,000-15,000mAh for comparable runtime. Pi 5 handhelds face the greatest challenges, drawing 2.5-4A under load—expect 3-5 hour runtime from 20,000mAh power banks. Passive cooling extends battery life versus active fans (which add 100-300mA draw). Calculate runtime using formula: Battery capacity (mAh) ÷ System draw (mA) × Efficiency factor (0.85 typical) = Runtime (hours). Always include battery percentage indicators to prevent unexpected shutdowns during gameplay.

